
Adding Payments
Adding a payment before an invoice.
To add a deposit, or any payment, to the Job before you invoice you will need to use the ‘Add Payment’ button located within the ‘Job Processing’ tab.
Find the job you wish to apply a payment by using the global search bar or the search tab on the main menu.
Once you’ve found the job, click the ‘Job Processing’ tab.
Switch from ‘Job Materials' to ‘Job Invoices’ on the left hand side.
Click the ‘Add Payment’ button

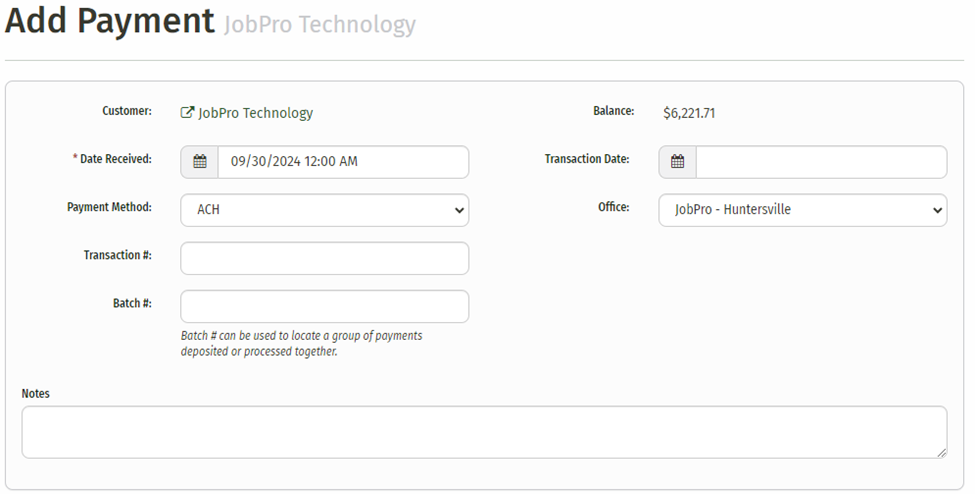
This will create a pop-up window. From here you can add your payment by filling in the text boxes and clicking ‘Add Payment’ at the bottom of the window.
Now when you are ready you can create an invoice. (You can find all the details about creating Invoices here: Invoices )
After your invoice is created you can navigate to the customer’s page and click the ‘Invoices/Payments’ tab and you will see both the payment you added and the invoice that was created.
Adding Payments through the Customer Page
You can add payments directly to a customer’s profile by finding your customer and navigating to the ‘Invoices/Payments’ tab.
Simply click the ‘Add Payment’ button and the process will be exactly as in the prior section. Fill out the information and click ‘Add Payment’ in the new window.

This tab also allows you to view any past payments and invoices associated with the customer
Adding/Applying Payments after an invoice has been created
If you are adding a payment after an invoice has been created, you can still use the two ways previously discussed in the sections above. The only difference is that now when you add that payment, you can add it directly onto one or more specific invoices. The last way you can add a payment is through the Invoice itself.
Adding a payment directly to an Invoice
Once you have created an invoice (or if you have already created an invoice, once you have found the invoice you are looking for), click the ‘Add Payment’ button.
Just like in the sections above, this action will cause a new window to pop-up that contains the same payment information as in all the other steps
Simply fill out your payment information.
This step is where the process changes. Instead of simply clicking ‘Add Payment’ when you have entered your Payment Amount, you can now choose to apply that payment directly to any invoice associated with this customer.
You have the option to click ‘Auto Apply’, which will auto apply your balance to any invoice located in the ‘Outstanding Invoices and Fees' section.
The payment will be applied to the oldest invoice and all subsequent invoices until the total has been fully distributed. (which may end up with a partially paid invoice depending on your totals)
Or you have the option to click ‘Max’ next to the invoice you would like to apply payment to.
If you are adding a payment and only want to apply part of the check to one invoice, the remaining amount will be stored as a credit to be applied later. (Any remaining balance will be displayed at the bottom right titled ‘Unapplied Amount’
