
Appointment Calendar
The Appointment Calendar is a feature in JobPro that allows you to see a calendar view of any and all appointments that have been created within your system. Appointments can be displayed by the assigned color of the salesperson or the office. This feature makes it easy to identify each individual appointment. You also have the option to filter your view for appointments to all or specific sales people. This allows each user to easily filter their calendar to only show their own appointments.
Finding the Appointment Calendar
The appointment calendar can now be found directly on your Scheduler. Navigate to the ‘Entry’ dropdown and select ‘Scheduler’
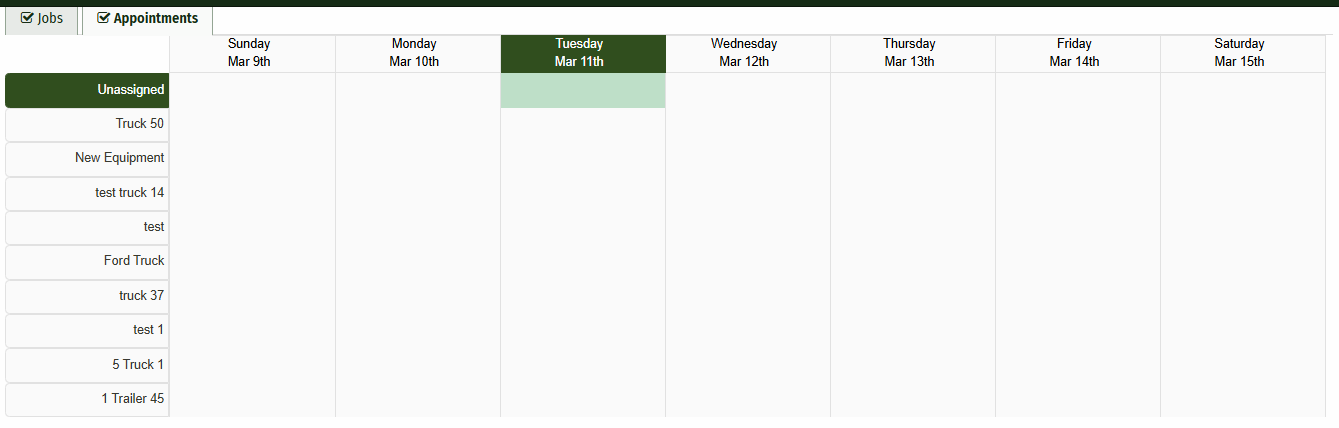
Click on the ‘Appointments’ tab to view the appointments that have been scheduled for the week
Calendar Settings
Your calendar settings can be adjusted through the Filter dropdown at the top of your scheduler
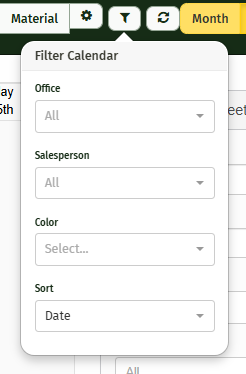
From here you can filter by office and salesperson. Plus you have the option to select which color option displays (office or salesperson) and how you want to sort the results. You can sort by Date, Customer, or Address.
Setting an Appointment
There are two ways you can now set appointments on your Appointment Calendar. The first option is to set it directly through the Datasheet Page:
Navigate to the Datasheet you need to set an appointment for.
Click on the ‘Appointment’ tab
This tab contains any previously set appointments as well as the ‘Add Appointment’ button.
Simply click this button and enter the new appointment information.
Start and End Date
Start and End time (optional)
Description (optional)
Appointment type (optional)
Make sure to click the ‘Save’ button at the top of the screen to save your appointment information.

To delete an appointment simply click the red 'X' under the Delete column.
The second way to create your appointment is directly on the scheduler.
Navigate to the scheduler
Click the ‘Add Appointment’ button on the top left hand side of the screen.

From here you can enter your start and end date/time, and the option to add a description, appointment type, customer, datasheet, and crew.
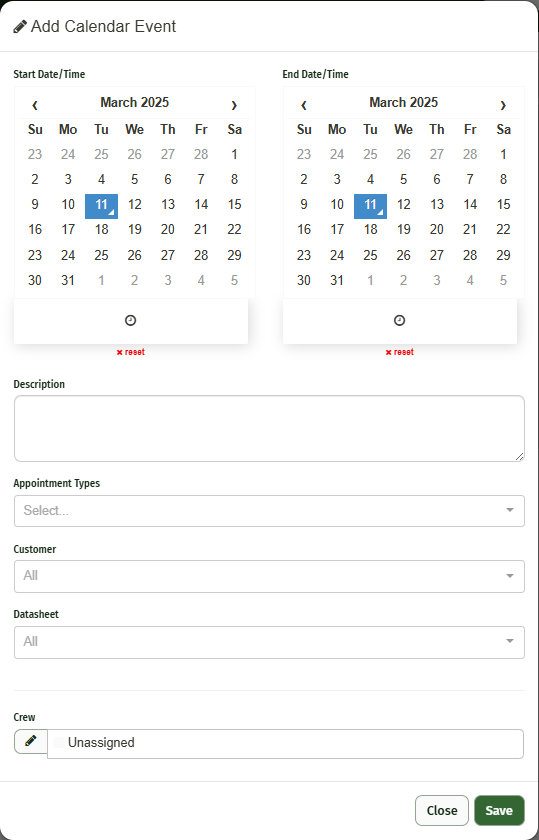
Simply click ‘Save’ to finish.
Once you have your appointments scheduled, they work much like the rest of the scheduler. You can drag and drop appointments to reschedule or simply right click the appointment to edit.