April 2017
AUTOMATICALLY SET THE INVOICE DUE DATE
The invoice’s due date can automatically be configured by setting the customer’s net due terms on the Main tab of the customer’s page. If the net due term is “COD” then the due date will be the date the invoice is created. If the net due term is “Net” followed by a number, the due date will be the number of days following the word “Net.” For example, if the customer’s net due terms are Net 30, the due date will be set 30 days after the invoice is created.
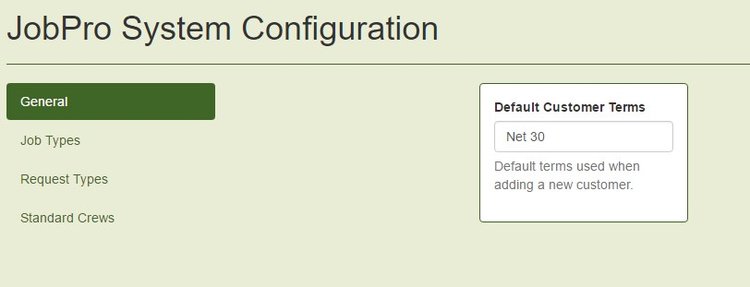
Your company also has system default capability to automatically set your customer’s net due terms for all new customers created. To do this, go the Settings drop-down and select System Configuration. Next, click the General section on the left-hand side of the pop-up window and then insert your default customer terms.
DAILY ALERT EMAILS
A daily alert configuration has been created to allow an administrator to configure daily summary emails to be delivered to specified email addresses. This configuration allows the user to select the entity (datasheet, bid, or job) and fields to export. The available fields are:
Date Created
Entity Name
Entity Status
Entity Type
Primary Contact
Contact Name
Company Name
Email
Work Phone
Cell Phone
Address
The daily emails will only include entities created during the previous day. Emails are configured at the user level and will send to the user's email address on file. The output email will be an attached excel document. The daily alert emails can be configured by going to the Settings drop down and selecting System Configuration.
TECHNICIAN APP UPDATES
The Material Tab has been updated to allow the technician to enter Material Item Actuals as beginning and ending values and calculating units used
Each quantity field on the Material Tab will have a "calculate" button.
Clicking the "calculate" button will display a modal with fields for start and end quantity.
Once the start quantity and end quantity have been entered, the system will calculate the number of strokes used.
The start and end quantities will be saved with the material for future reference.
The "calculate" button will be available on all quantity fields regardless of item type or category.
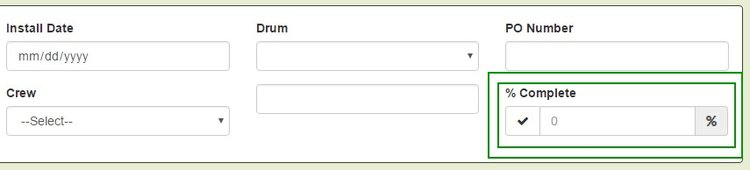
The Material Tab has also been updated to allow the technician to enter the % complete for each item which will display on the Job Processing for the admin to review.

COMMISSION RATE BY CUSTOMER
If you are using fixed commission rates by salesperson, you can also set commission rates by customer. On the customer page, on the main tab, a commission rate can be added. This commission rate will override the salesperson’s fixed commission rate on bids and jobs for this customer. This could be used for certain builders where jobs are theoretically closed when the salesperson is creating the bid and an adjusted commission rate is needed apart from the salesperson’s standard commission rate.

FINALIZE CHANGE ORDER UPDATE
Before the upcoming March release, if a user clicked the Finalize Change Order button more than once before the CO had completed its process, the system would add all the items from the Change Order as many times as the button had been clicked. Since this has been brought to our attention, we have stopped the system from finalizing the Change Order more than once. Once the Finalize Change Order button has been selected, the system will only take that finalize command once and will not allow a user to select the button again.

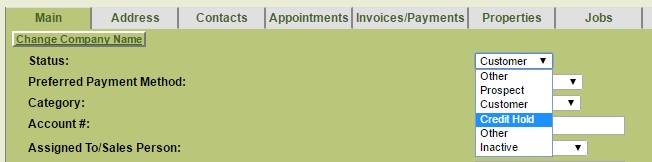
CREDIT HOLD CUSTOMER WORK FLOW
A new customer status of “Credit Hold” has been added to JobPro. If a customer’s status is set to Credit Hold, JobPro will prevent a salesperson from creating a job until the customer’s status is updated from Credit Hold. Alerts can also be set up when the customer’s status is changed. To set up alerts, go to the Settings drop down and select Configure Alerts.
SCHEDULER UPDATES
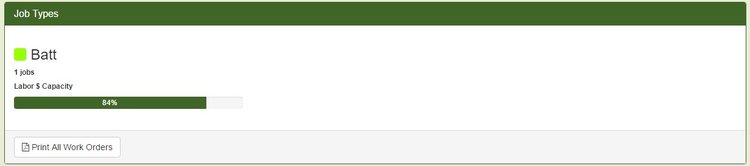
Capacity
An organization setting has been added to allow your company to choose whether to track capacity on the scheduler by Labor Dollar Amount, Material Quantity, or Estimated Duration.
To update your job types using these new settings, go to the Settings drop-down and select System Configuration, then Job Types. Then, click the job type you wish to update.
The daily capacity amount is set on the job type. For example, if you wish to control capacity by the Labor Dollar Amount and your labor cap per day for that job type is $2,000, enter in 2000 for the Labor Dollar capacity for that job type.
The daily capacity of each job type will display on the scheduler and a progress bar will track the capacity as jobs are being scheduled.
The capacity can be adjusted day by day or as needed on the schedule.
Filters
Add the ability to filter the schedule by Bid Category in addition to Job type
Add the ability to multi-select Bid Category and Job Type filters. Hold down the Control (Ctrl) button as you make your first selection and continue holding the button while you continue with your multi-select.
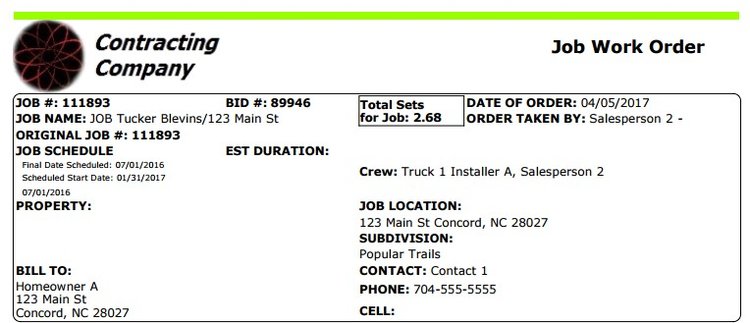
UPDATE TO JOB TYPES AND COLOR CODES ADDED TO WORK ORDERS
Managing Job Types has been moved to the system configuration section found in the settings drop down. Click on Job Types on the left side of the screen to access your current Job Types. To add a new Job Type, click the Plus icon at the top of the list. To manage your Job Types, click on the name of the Job Type that you want to edit. Here, you can edit the name, add a description, select a color code, and input a capacity. The capacity is shown on the “Day” view on the scheduler to manage your capacity of jobs scheduled by Job Type.
Additionally, if the job has a Job Type that has a color code setup, a colored bar will be shown at the top of the work order print out matching the Job Type’s color code.
VIEW ALL PHASES ON PROFITABILITY TAB
When a job has been split into multiple work orders, the profitability tab give the user the ability to view the profitability across all linked jobs by changing the view in the upper left corner from “This Phase Only” to “All Phases”.
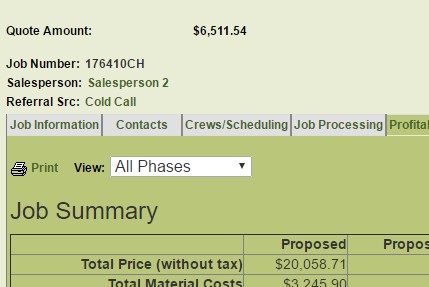
This feature used to only work before processing complete was clicked on the job processing tab. This update allows the user to view all phases even after the job has been processed completely.
WORK IN PROGRESS
The Work In Progress (WIP) report has been added as one of the JobPro reports under the Summary Reports section in the system. This report allows the user to filter through a job’s created date, the job statuses the user is looking for, and the report can be grouped either by the salesperson associated to the job or the job’s type. The WIP report will provide a clickable link to the job name, salesperson, job type, job status, job amount, job WIP amount, and the invoiced amount on the job. This report is an excellent way to keep up-to-date with jobs in specific statuses. Totals for all the job amounts, job WIP amounts, and invoiced amounts are at the top of each section.

CREATE CO FROM UNSELECTED OPTIONS ON ORIGINAL BID
This new feature allows the user to create a Change Order Bid from any previously unselected options from the original bid. If you go back to the original bid that had unselected options after the job was created, you will notice a new check box next to each option. The user can check this check box then click the new button on the top right of the bid worksheet tab to create a change order from the unselected option(s).
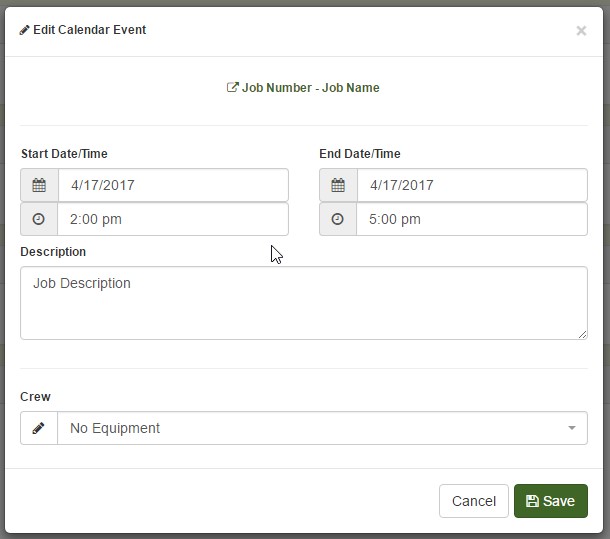
EDIT CALENDAR EVENTS ON SCHEDULER
On the Day view of the Scheduler, a new feature (button) has been added that will allow the user to edit the event while still on the Scheduler. Previously, users had to go back to the job to edit the information. This new feature will provide the ability to edit the start and end date/time along with the crew assigned to the job. Users will also be able to easily edit the job’s description.

ENHANCEMENTS TO PAYROLL REPORT
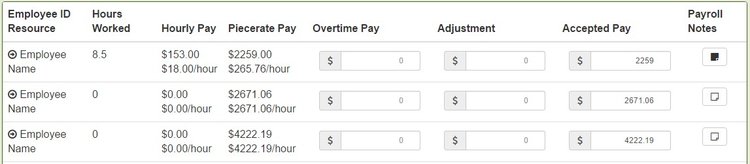
Several enhancements have been included to the Payroll Report for this release. The Payroll report is now a combination of the Payroll report, Labor report, and Time Summary report so that all your payroll information is kept in one, succinct place. Pick your pay period and the resources with any hourly and/or piece rate time will populate for you. The user will see the resource name, hours worked, hourly pay with a total, and piece rate pay with a total. New columns have been added to insert overtime pay and to make an adjustment on the resource’s pay amount. The Accepted Pay Amount will show what the resource should be paid for that pay period. An organization setting has been added to JobPro to automatically set the Accepted Pay Amount to either the maximum between hourly and piece rate pay, just hourly pay, just piece rate pay, or a combination of both hourly and piece rate pay. The default organization for all organizations will be to populate the Accepted Pay Amount with the maximum dollar amount between hourly pay and piece rate pay. *Please contact our JobPro Support Team to have this setting configured for your organization.
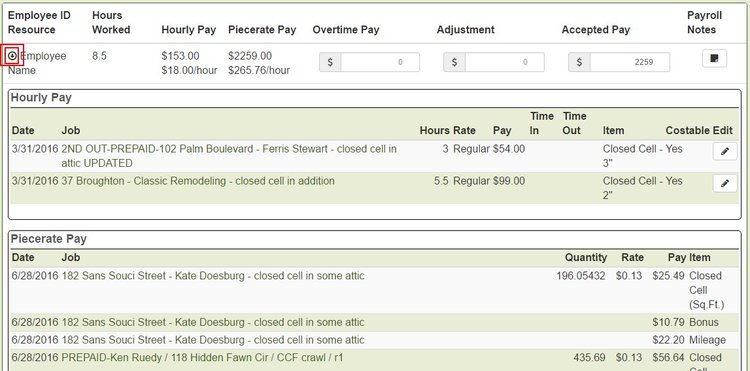
There has also a new icon added next to the resource name that looks like an arrow pointing to the right inside of a circle (). Clicking on this icon will expand the resource to show the jobs associated to hourly pay and piece rate pay. The date of the job, a clickable link to the job name, hours (if applicable), quantity (if applicable), rate, and the item will all show for quick discernibility as to which jobs and items are being included in the pay period.
ABILITY TO EXCLUDE A CREW MEMBER FROM PIECE RATE
JobPro is introducing the ability for a crew member to be excluded from piece rate. This function is designed primarily for Crew Supervisors or Crew Managers.
When a resource is excluded from piece rate pay, that resource can be put on the crew without distorting the piece rate pay for the other crew members on the job. The Crew Supervisor/Manager will be able to see the job assigned to him on the Offline Tech App while also allowing him/her to review the time and actual material entered on the job.
What if the Crew Supervisor/Manager is also working with a crew on a job and needs to get piece rate pay for his efforts? No problem, just assign a piece rate percentage to the Crew Supervisor/Manager and this will override the setting to have the Crew Supervisor/Manager included in piece rate for that job only.
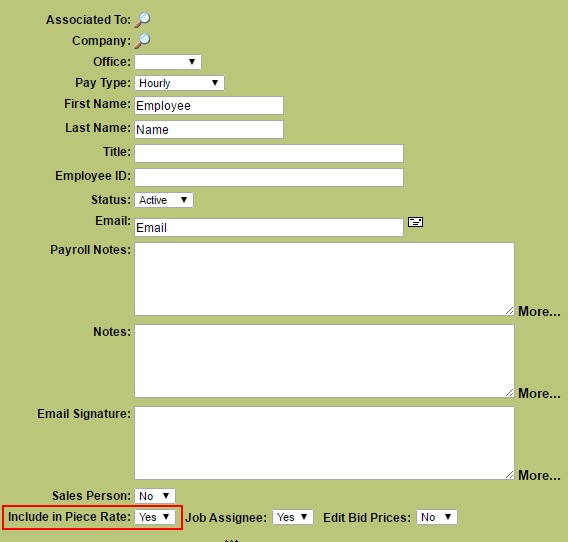
To exclude a resource from piece rate pay, please go to Search > Resources. Click on the appropriate resource and scroll down to the section “Include in Piece Rate”. Change this setting from “Yes” to “No”. The default setting for all resources will be “Yes” which will include that resource in piece rate pay.
OPTION TO HIDE BID GROUP TOTALS ON PROPOSAL
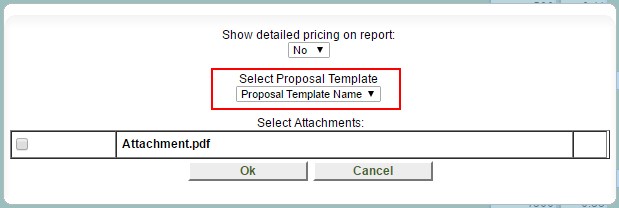
An option to hide the bid group totals on the customer proposal has been added to the JobPro system. This option is controlled by a setting on the Proposal Template whether to show grouping totals or not to show grouping totals. Once a bid is ready to be turned into a proposal, the user will click on the Customer Proposal button and choose which Proposal Template to use. The selection of Proposal Templates is underneath where the system asks if the proposal should show detailed pricing. *To have a proposal template set to not show group totals, please contact our support team with proposal template you would like to update.
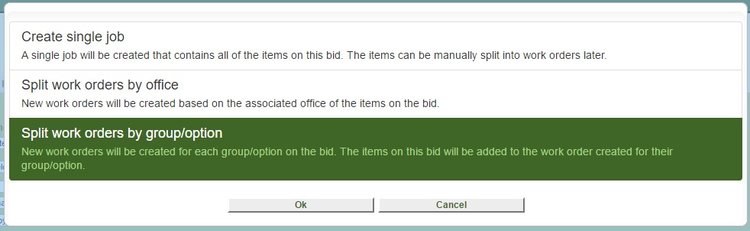
OPTION TO SPLIT JOB BY GROUPS
When creating a job from a bid, JobPro now gives users the option to split the job into work orders based on the groups from the bid. The option to create a single job from all bid items and the option to split the job into work orders based on the items associated office are still in effect.
The user will click the Create Job button on the Bid Information tab of the bid. This will produce a pop-up window giving the user the three choices as to how the job will be created (single job, by associated office, or by group). If the user selects to create the job and split out the groups with work orders, the items that are on the base part of the bid will be put on the base job. All items in a bid group will be put together in separate work orders attached to the job.
ACCOUNTING REPORTS
JobPro has made enhancements to the Invoice Summary report and is introducing the Payment Summary report. Users can access both reports by going to Reports > Summary Reports > Invoice/Payment Summary.
The Invoice Summary report has been updated with several new columns and the ability to “click into” an invoice to show the invoice items directly on the report. The invoice id number, invoice date, invoice status, customer, salesperson, PO number, invoice amount, amount paid, and the remaining balance all show at the invoice level. Once you dive deeper into the invoice item level, the report will display the job name, job type, item name, item category, and the item total.
The Payment Summary is a collection of all payments entered into JobPro. The report is driven off a date range and can be grouped by salesperson for easy viewing. The Payment Summary will provide a list of payments in the date range, the amount of each payment, and to which invoices the payments have been applied.
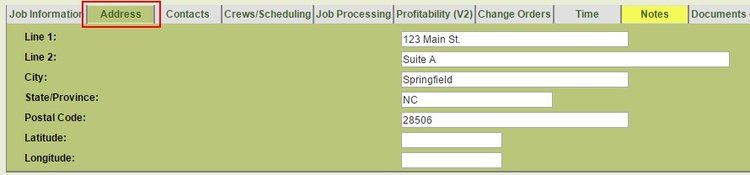
NEW ADDRESS TAB ON DATASHEETS, BIDS, AND JOBS
A new tab titled “Address” has been added to all Datasheets, Bids, and Jobs. This new Address tab will be where the job location will need to be inserted. Putting the job location information on this Address tab will assist your organization with future enhancements coming from JobPro that will revolve around locations. The older, editable box for the Job Location has been reassigned to Job Location Notes. These Job Location Notes will show on the work orders and proposals.