Batch Payments
This guide will show you how to add a batch payment. A batch payment is when you pay multiple recipients at once through a singular bank account in a singular payment, which is more efficient than making lots of separate payments. The primary purpose of batch payments is to increase efficiency by processing multiple payments as a single group or "batch" instead of individually.
In order to add a batch payment, start by navigating to the 'Add' tab and click "Batch Payment". This will open a new window for you to enter information into. The Batch Payment Page will consist of three sections: Batch Payment Details, Payment Details, and Associated Invoices.

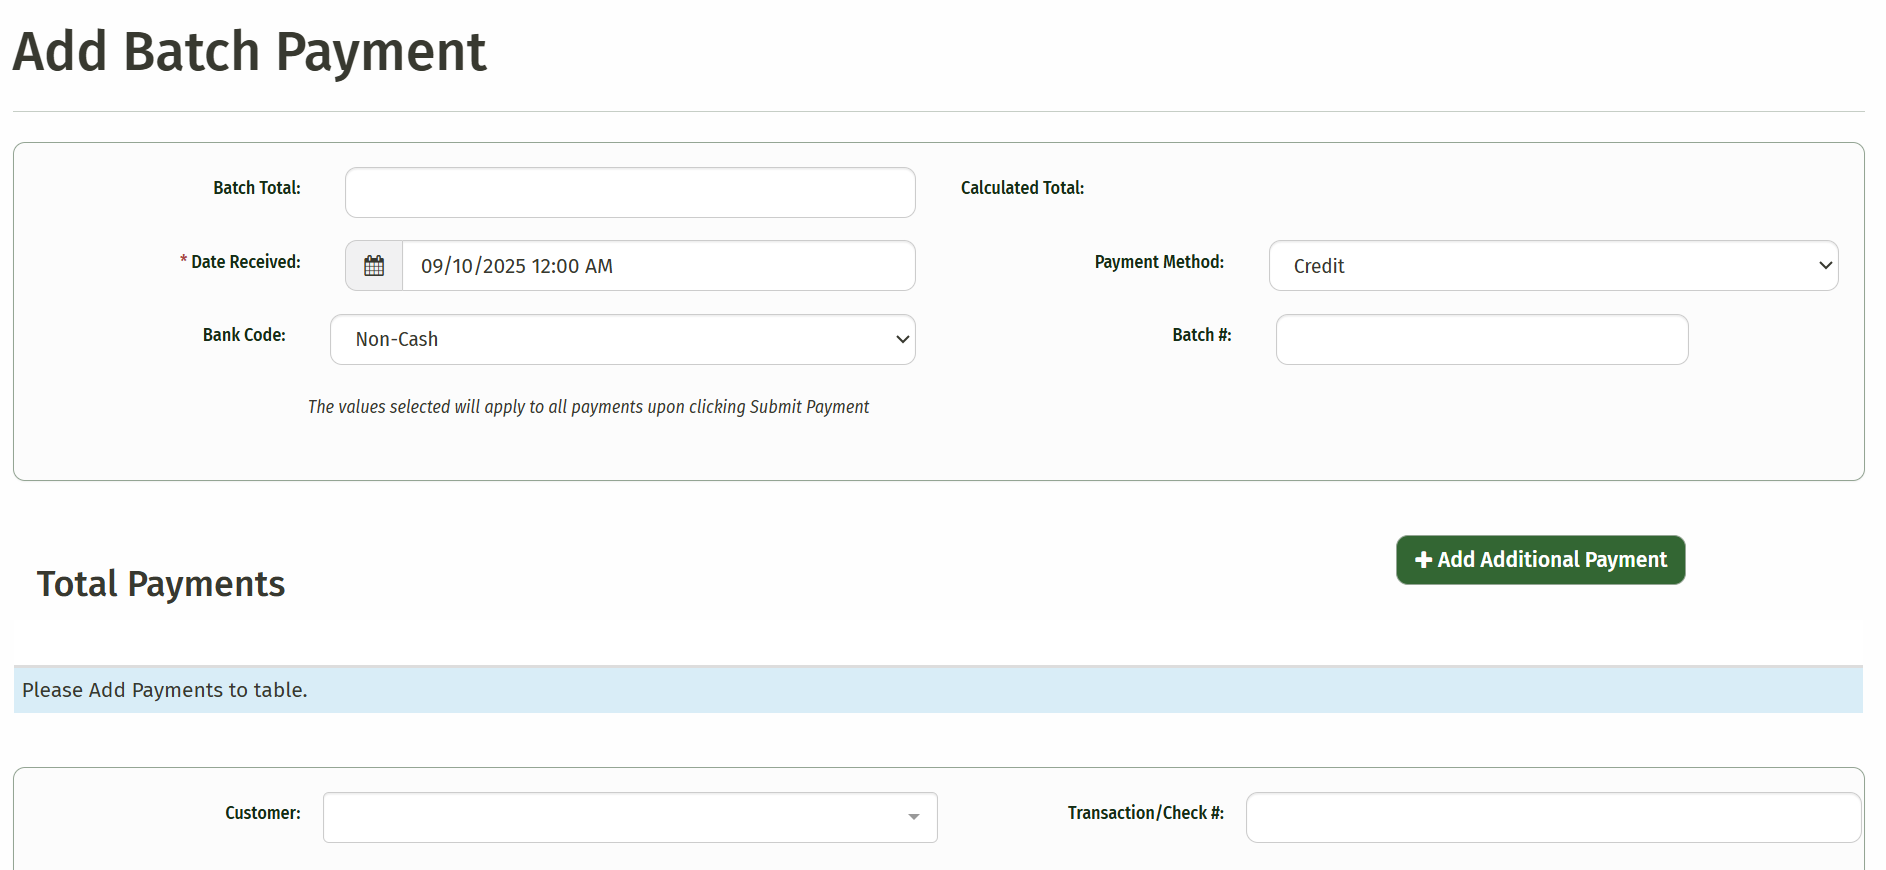
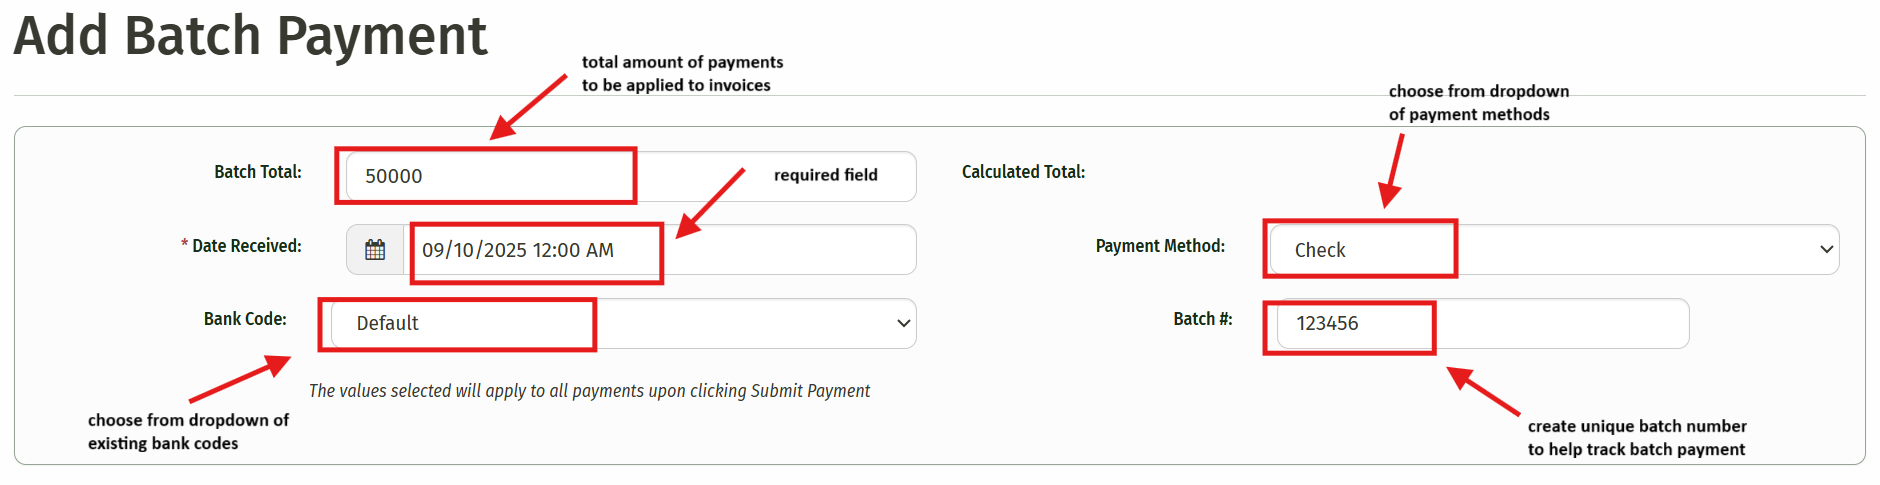
The Batch Payment Details section allows you to enter the Batch Total and will automatically put today's date in the Date Received field, which is required. You also have the ability to select the Bank Code for your organization from the dropdown, along with the Payment Method. You can also enter the batch number, which should be unique.
Note: If you enter in a batch number that already exists, the system will show a Validation Error that will inform you that the batch number already exists and will be duplicated.
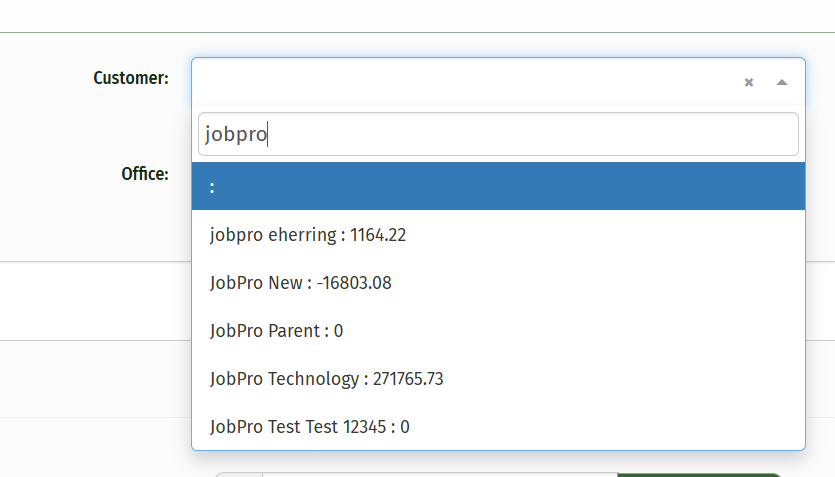
Once you have completed filling out the fields in the Batch Payment section, scroll down to the Total Payments section. You can begin typing in the name of the customer in the customer field and it will populate below. You can choose the office from the Office dropdown, as well as enter a transaction or check number in the next field. Once again, the Transaction Check Date will automatically put today's date in the field. There is also a field to enter any relevant notes associated with the payment.
Directly below you'll see a required field to enter the payment amount, a field to filter invoices by invoice number, job number, job name, PO number, and a dropdown for the Invoice Office to choose an office from.

3. Once you have chosen an invoice office and typed in a filter to apply if needed, the system will provide you with any unpaid invoices associated with the customer you chose below in the Invoice section. You'll see that you have the ability to click on the invoice number or job number for each invoice to view it in another window.
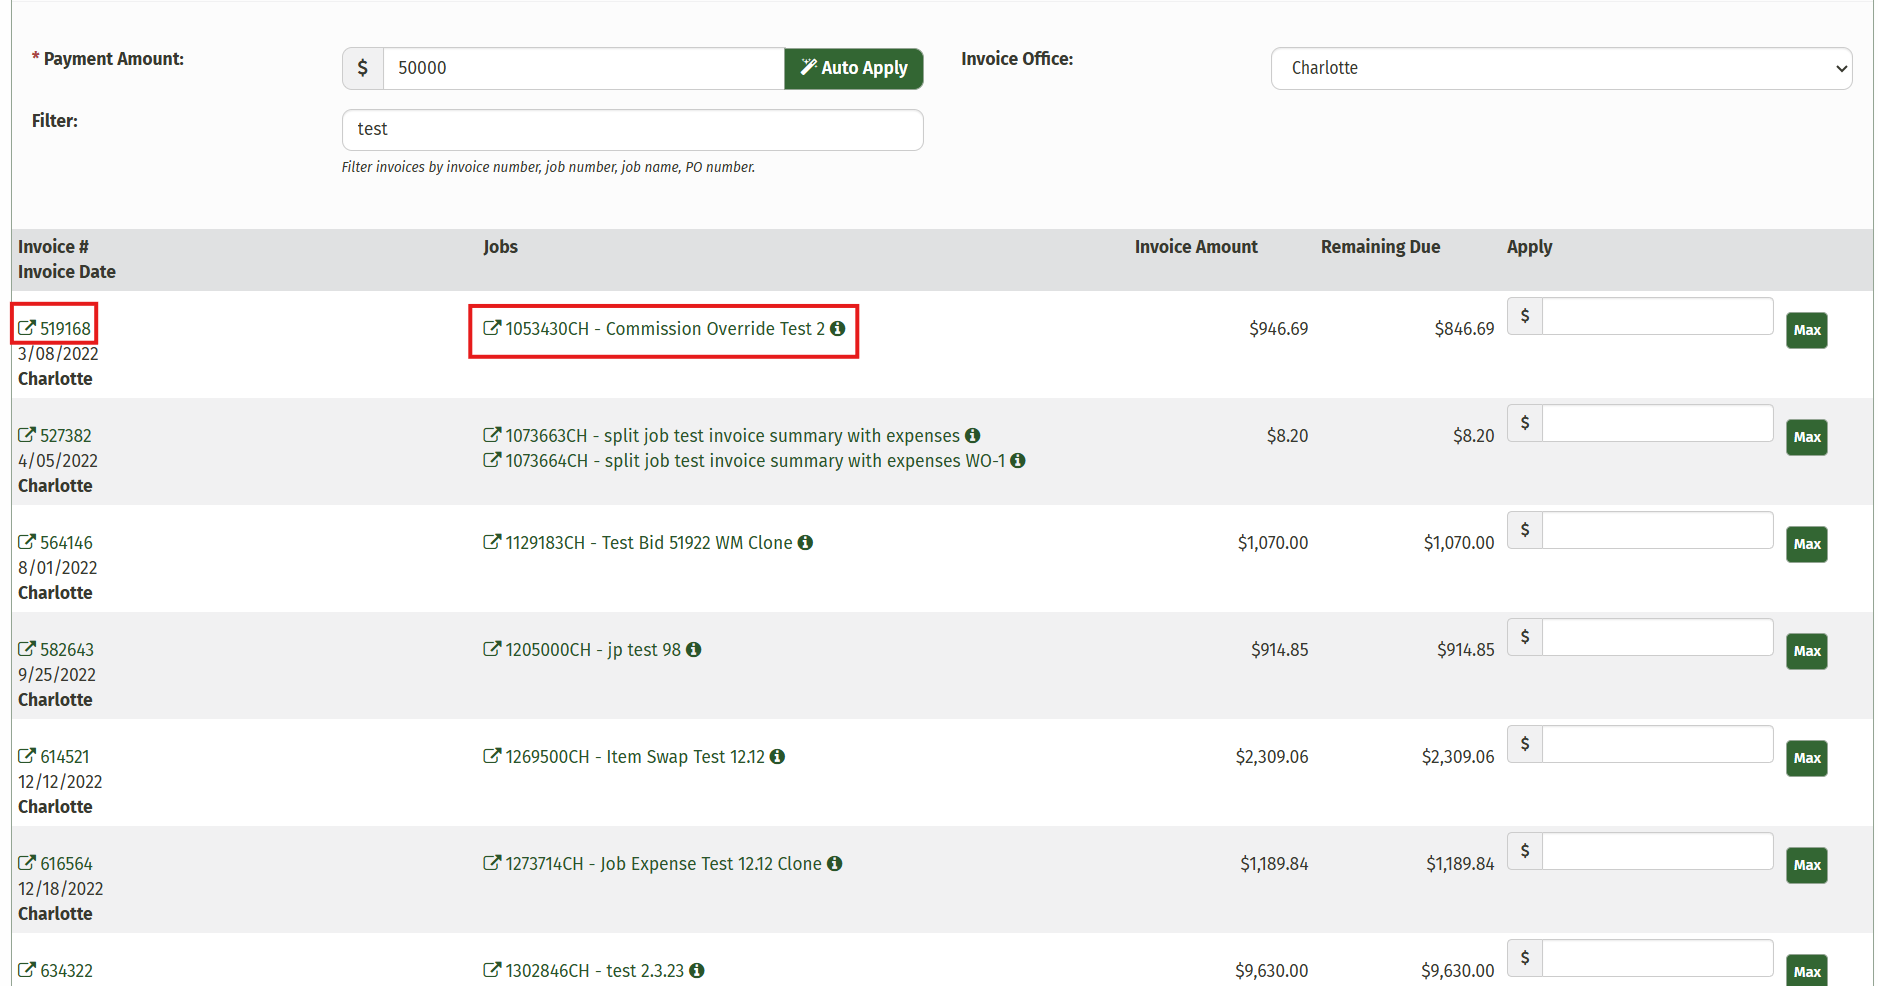
In the Payment Amount field, type in the number you'd like to apply to the outstanding invoices. Be sure to enter an amount that is equal to or greater than the lowest invoice amount, or the system will give you an error.
If you click the Auto Apply button, the system will distribute the amount to the oldest invoices associated with this customer and the invoices that have an applied amount to them will turn green.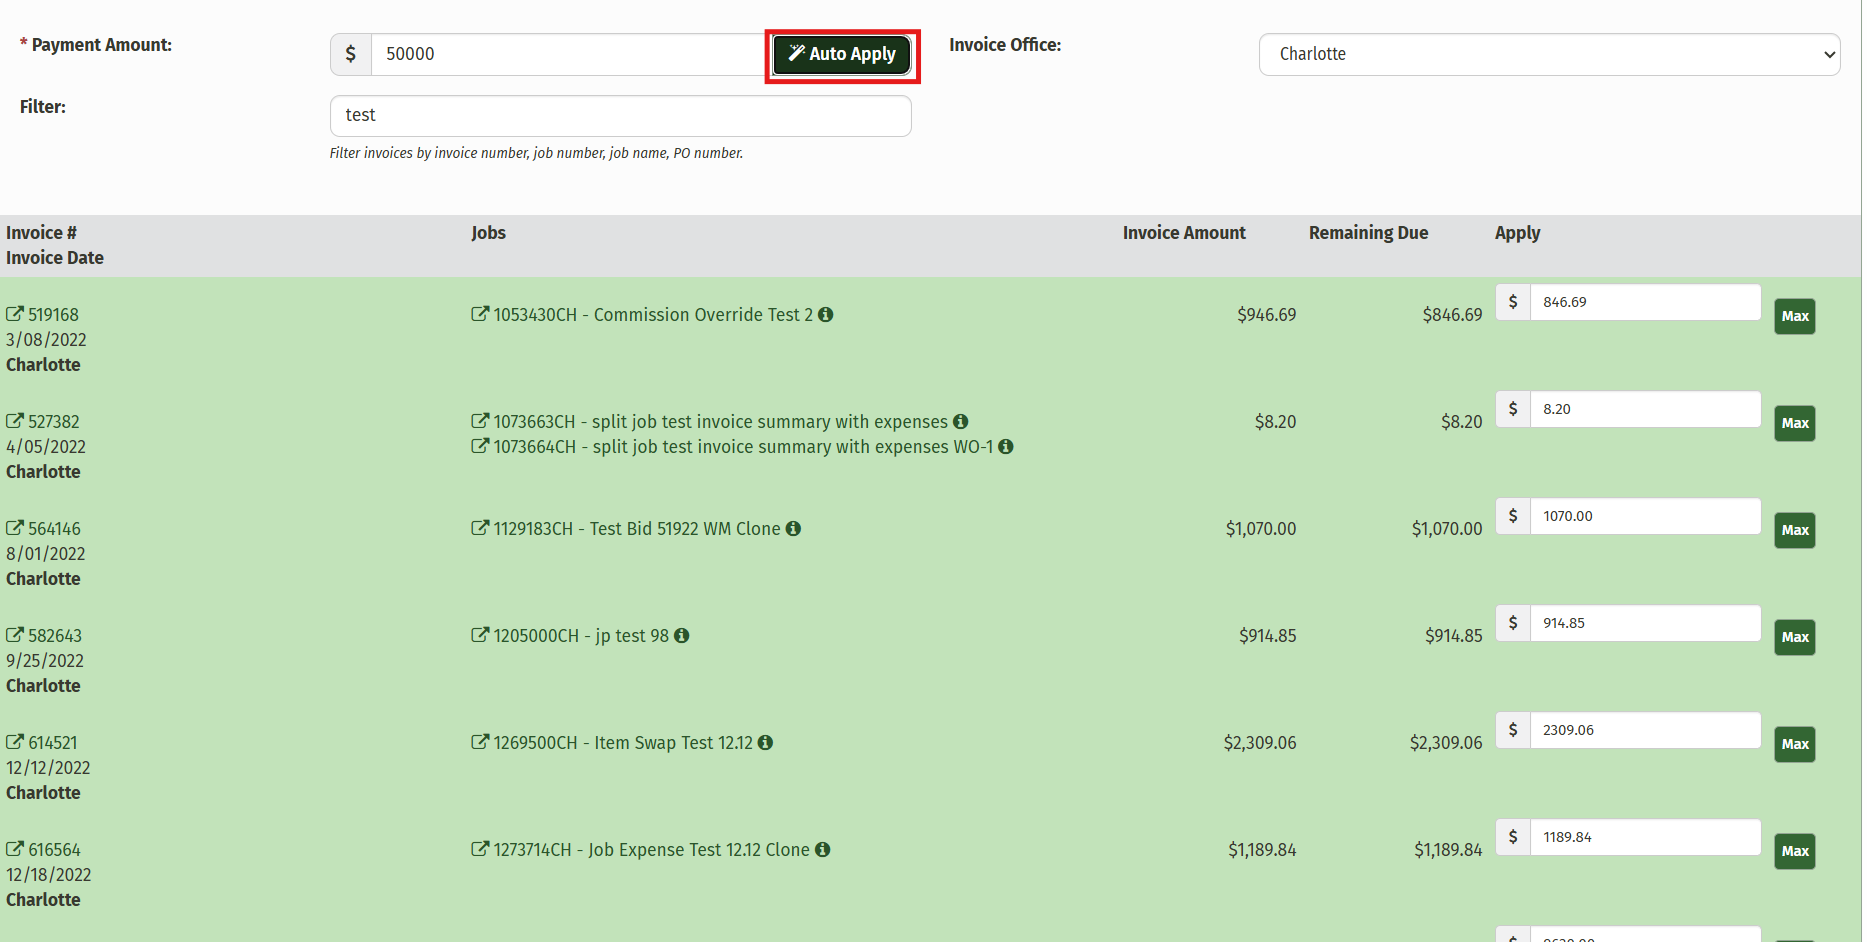
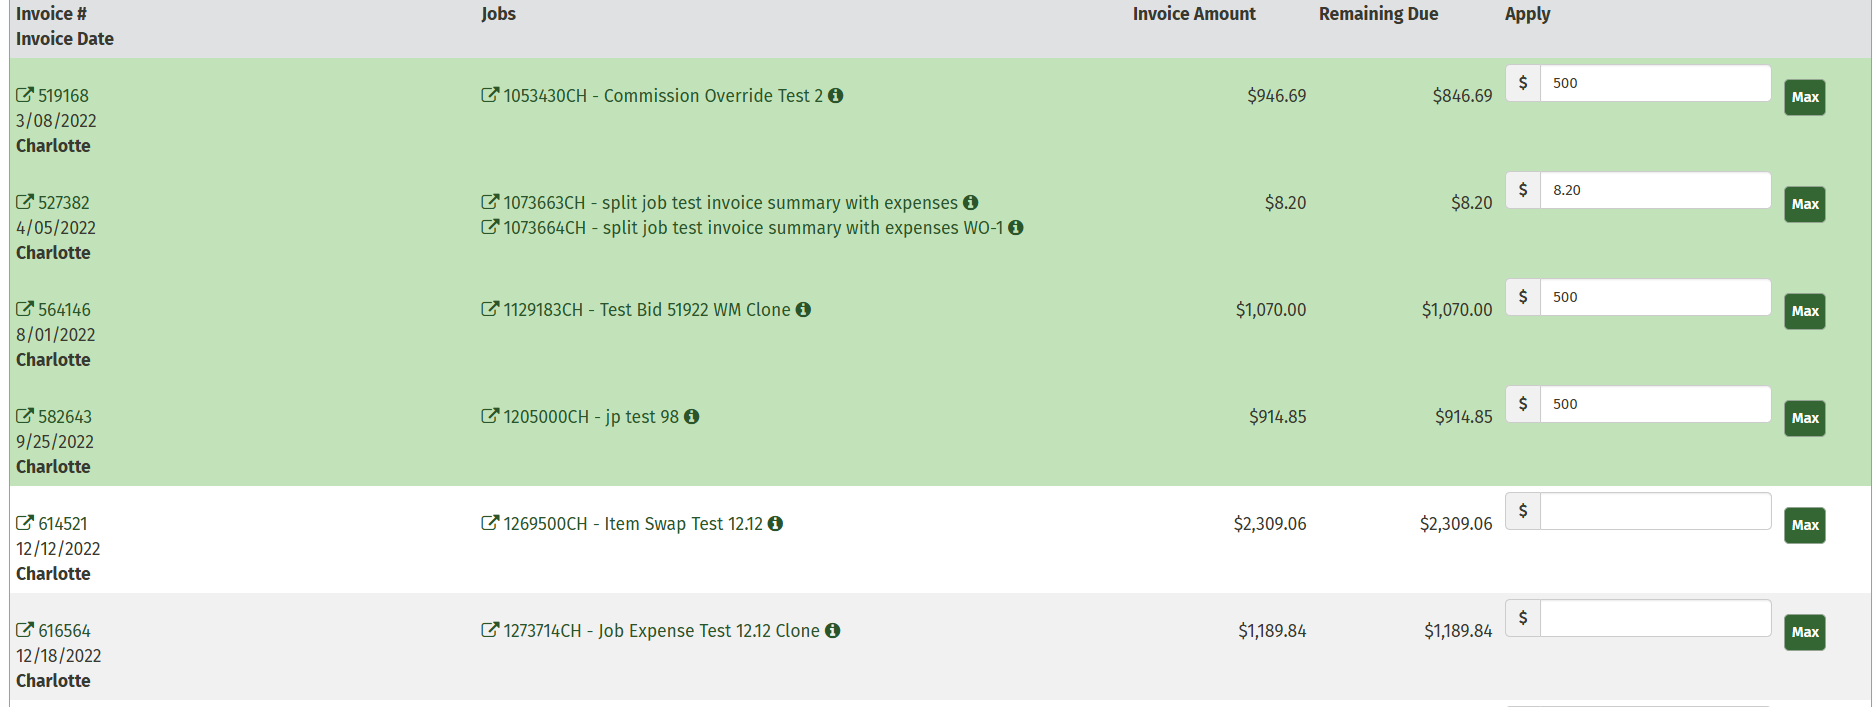
You can also manually enter the amount to be paid for each invoice individually, or click the Max button to automatically fill out the field with the total amount of the remaining due for that invoice. If you choose this method, the invoices will turn green as you apply an amount to them.
Once you have applied the payment amount to the invoices and the Unapplied Amount Remaining is $0, scroll down to the bottom of the page to view the action buttons below.
The Reset Applied Payments button will clear any of the amounts that were entered for the invoices if you'd like to start over.
The Save Payment button will bring you to a summary page to view the patch payment, where you can edit it, delete it, add an additional payment, or submit the batch payment.
The Save & Add Additional Payment button will save the batch payment you created and allow you to create another payment within this batch. This could include a different customer with different invoices or a different office.

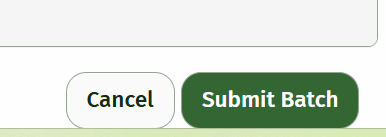
When you have completed any necessary edits and payment applications, click Submit Batch to finish.
Things to Consider:
Be sure you have saved any additional payments you add, if there are any other unsaved payments, the system will let you know
Make sure that the batch total matches the total payment amount
If relevant, make sure that the invoices you are going to apply payments to are in an office with an open period for the date inputed for the batch payment.
Finding and Accessing your Batch Payment
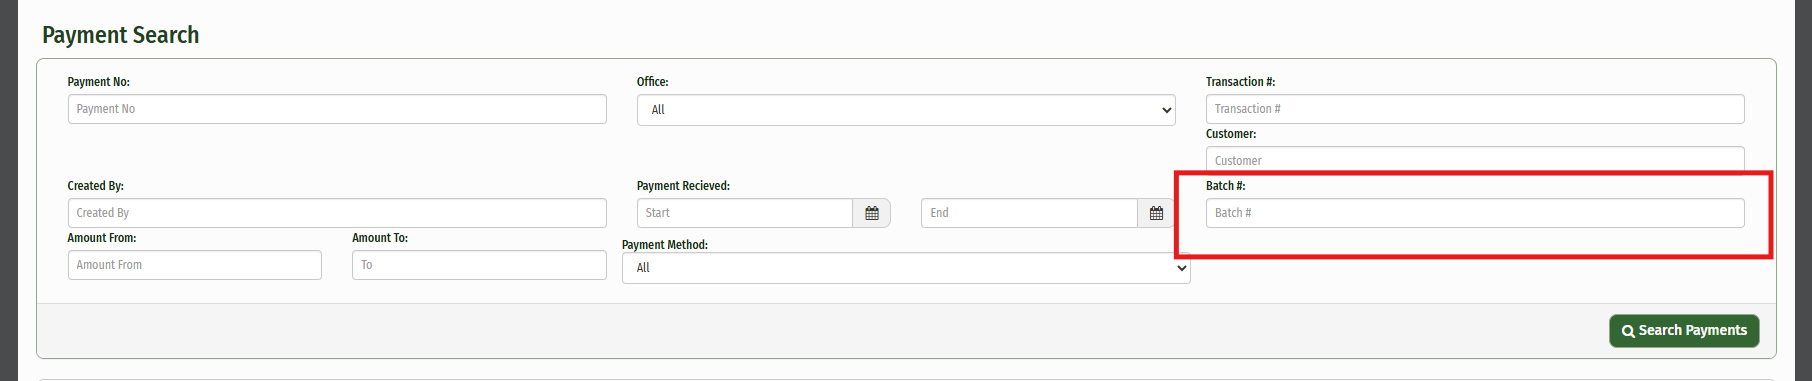
If you need to access the Batch Payment again at any time, you can find it using the Payment Search. Navigate to the Search tab and click Payments. The simplest way to find the batch you're looking for would be to type in the batch number in the field on the very right. From there, you can pull up the batch payment and see the payment id.