
Editing a Bid
Bid Page Details
There are ten tabs within the Bid page that allow you to edit or reference information

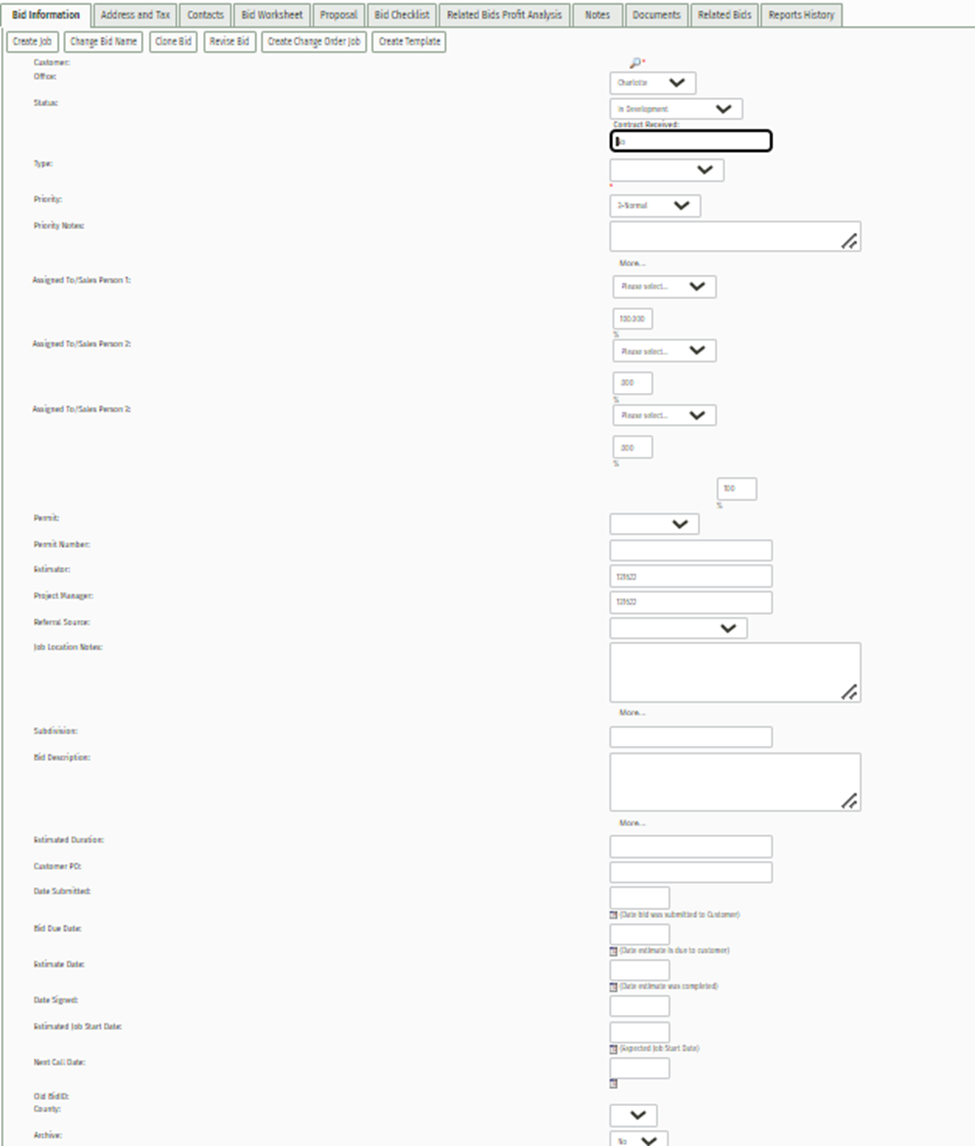
Bid Information
Allows you to view and edit the information related to the bid.
Status--i.e. “In development”, “Accepted”, “Rejected”
Priority--i,e, “Normal”, “High”, “Emergency”
Add notes that are relevant to your priority status in the textbox below labeled 'Priority Notes'
Referral Source-- How your customer heard about you
Estimated Duration--Set an estimated length for the job
Date Submitted-- Date the bid was submitted to the customer
Date Signed--Date when the bid was signed by the customer
Estimated Job Start Date--Expected start date
Next Call Date--When a date is entered here, the salesperson will receive an alert notifying them to follow-up on this bid. A notification alert is sent via email along with an alert displayed on your JobPro homepage.
Allows you to create job
Simply Click ‘Create Job’ to convert your finished bid into a Job
Changing a bid name
From the bid information tab, click ‘Change Bid Name’ this will create a pop-up window that will allow you to enter a new bid name
Clone Bid
If you would like to create a copy of this exact bid click the ‘Clone Bid’ button.
Warning!! Cloning bids clones everything exactly as it is on the original bid. If an item price has changed after the original bid was created it will not convert with the new bid. To bypass this you can click the ‘Update Items’ button on the Actions dropdown menu within the Bid Worksheet tab of the new clone.
Revise Bid
To make a revision to the current bid, click ‘Revise Bid’
Create Template
If you would like to create a new template click the ‘Create Template’ button. This will guide you to a new screen where you can enter the template's name and description and start creating template by adding new items.
Address and Tax--This tab allows you to edit the Job Address and select a Tax Rate to be applied to the job.
**Insert future Tax Rate page link
You have the option to enter the job address in manually or, if it is the same as the customer billing address, you can select the ‘Copy from Customer Billing Location’ button to auto-populate the address.
Contacts--This tab allows you to attach or remove contacts to the bid.
To add an existing contact, simply click the ‘Attach Contact’ button and select your contact from the pop-up window.
To remove a contact, click the red X located on the right side of the Contact line.
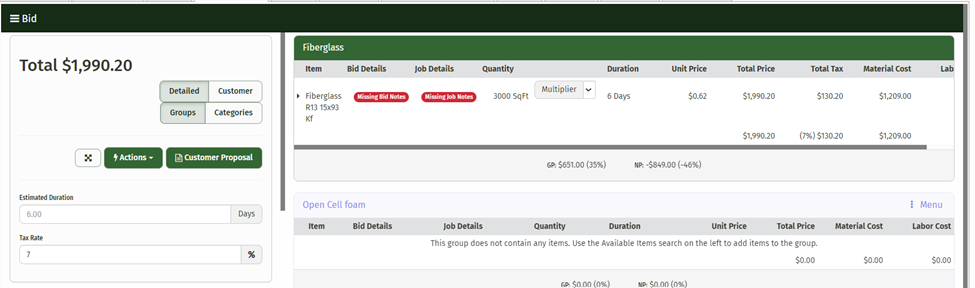
Bid Worksheet--This tab is where you will add any items that will be included in the job.
To add items, you can search for the specific item you are looking for in the ‘Available Items' box.
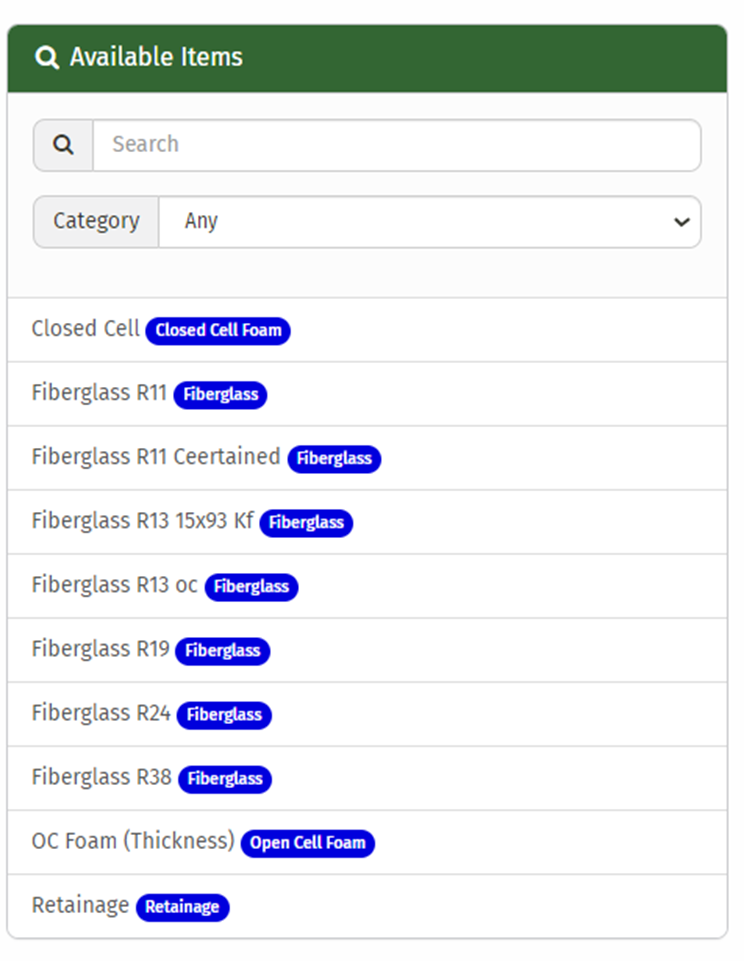
You can begin by typing what you are looking for in the ‘Search’ Bar. As you type the items will auto populate in the lines below. Simply click the item you need and it will be added to the bid.
The Bid total is displayed at the top of the screen. Also, within this box are a list of ‘Actions’ you may choose to use while editing your Bid. A more detailed look at the Actions dropdown is located below this section.
Bid Checklist--Gives you a list of questions you can respond to that relate to your bid
Related Bids Profit Analysis--Shows you past bids that are similar to the one you are working on
Notes--Same as the notes on a Datasheet. Once a note has been submitted, it cannot be deleted.
Documents--Same as the documents on a Datasheet. Allows you to upload documents such as photos or PDFs that are related to this bid.
Reports History--A history of all reports created from the current bid.
From here you can email your Customer Proposal and be updated on the status of the report, i.e. ‘Sent' ‘Viewed’ ‘Accepted’.

Bid Worksheet Details
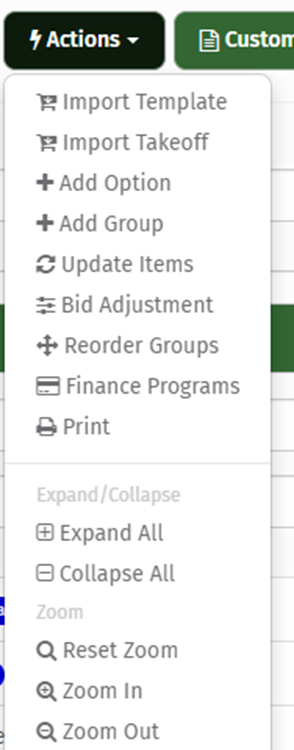
Actions Dropdown
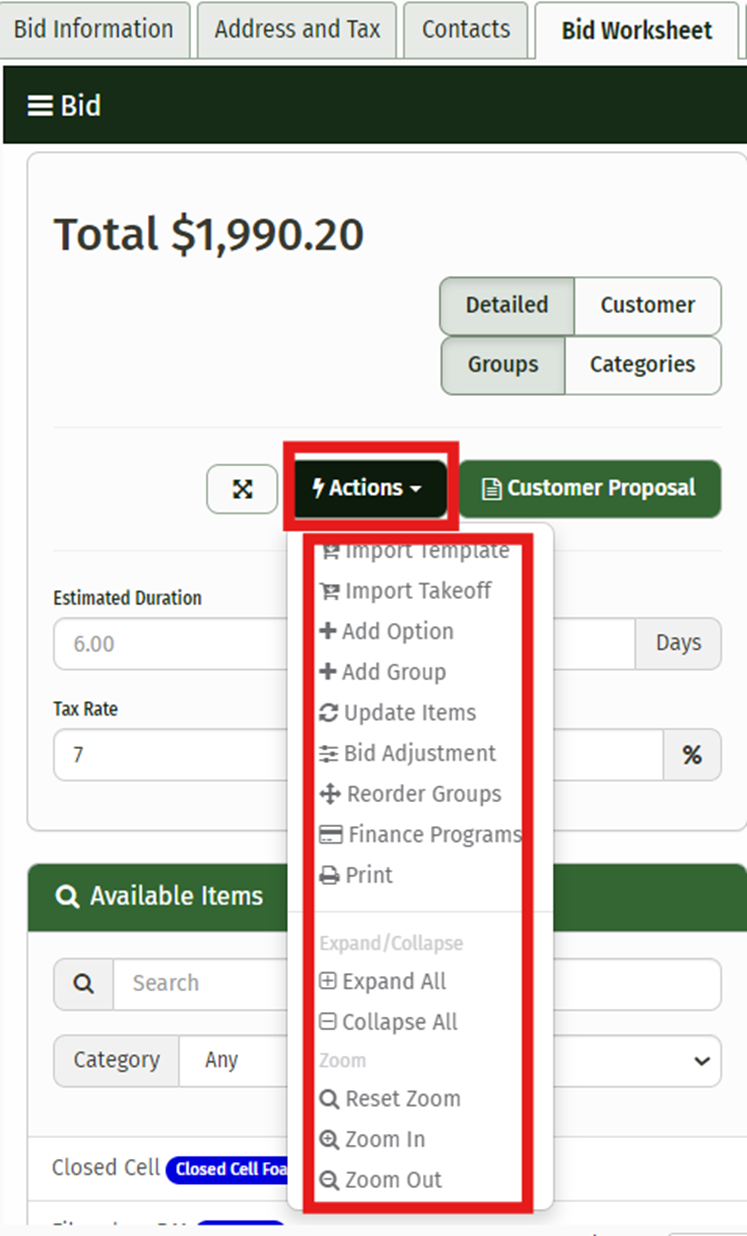
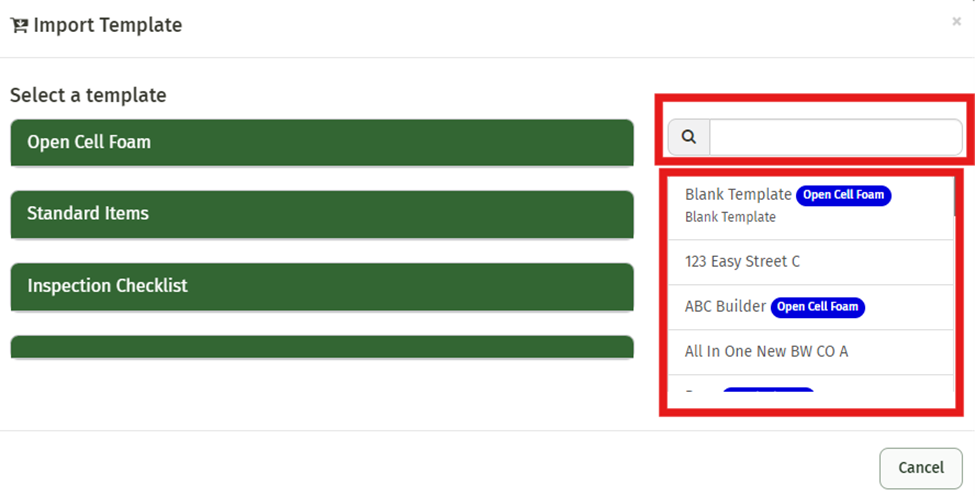
Import Template--You can import a template that has previously been created. This allows you to have a preset list of items, groups, or options that will automatically be inserted with the template.
The ‘Import Template’ option will generate a new text window that allows you to search for each template by name.
Simply begin typing the name of your template and it will auto-populate below the search bar. Or if you do not remember the name of your template, you can simply scroll through the list and find it.
After choosing your template, the system will ask you to select the items you would like to import, check the boxes next to the items you would like to add and click ‘Next’
Choose where you’d like to import the template and select ‘Import Items’
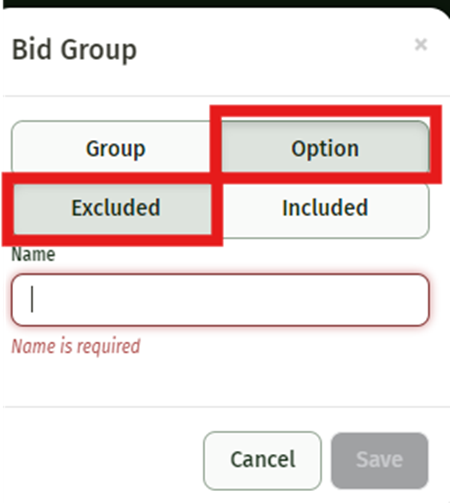
Add Option--Allows you to add an option to your bid that the customer can choose is they want or not.
Simply click ‘Add Option’ and you will be prompted to name the option and choose whether or not this option will be included in the bid (Excluded gives the Customer an option to add after their proposal is sent, Included will automatically include this option in the proposal)
Be sure that the ‘Option’ and either ‘Excluded’ or ‘Included’ is selected.
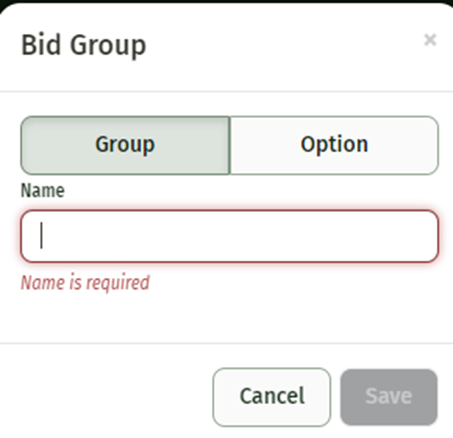
Add Group-- Allows you to group certain items how you see fit.
Click ‘Add Group’ and you will be prompted to name the group. Click ‘Save’ and you are ready to add your items to the new group.
Update Items-- this will update the pricing on all the items in your bid.
This action is not reversible, you will be given a warning before moving forward. Click ‘Ok’ to continue.
Although this is not reversible, you will still be able to manually change each individual item price
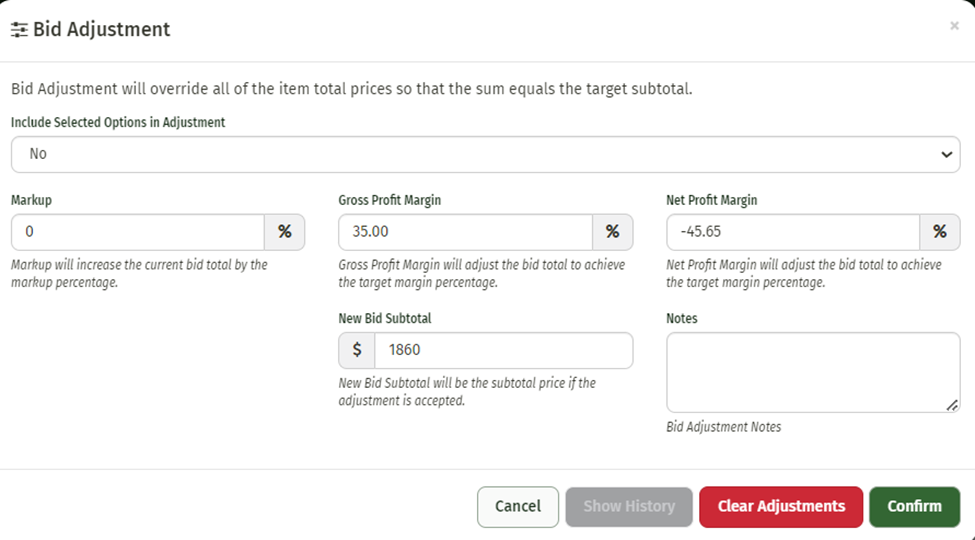
Bid Adjustment--Allows you to manually adjust the total price of the bid. This can be done by adjusting your Gross/Net Profit Margins, a markup percentage, or simply creating a New Bid Subtotal.
Reorder Groups--Allows you to arrange your groups in the order you would like them to appear on your proposal
Print--Allows you to print your bid.
Expand/Collapse--Allows you to expand or collapse all items on the bid
Zoom--Adjusts how big or small the text is on your bid screen
Adding Items
Once you have chosen an item it will appear to the right on the worksheet. From there you will enter the amount you will need for the job.
The calculations for total cost and volume, if applicable, will be done for you. Included in the total cost is any applicable tax or markup.
You have the option to enter information into the ‘Bid Details’ textbox. which will be displayed on the customer’s bid Proposal.
You also have the option to enter information into the ‘Job Details’ textbox. This will be displayed on the Job Work Order.
Click inside the box to show a larger textbox that can be edited.
Items can be deleted from the bid by clicking the red trashcan icon located on the right side of an expanded item.
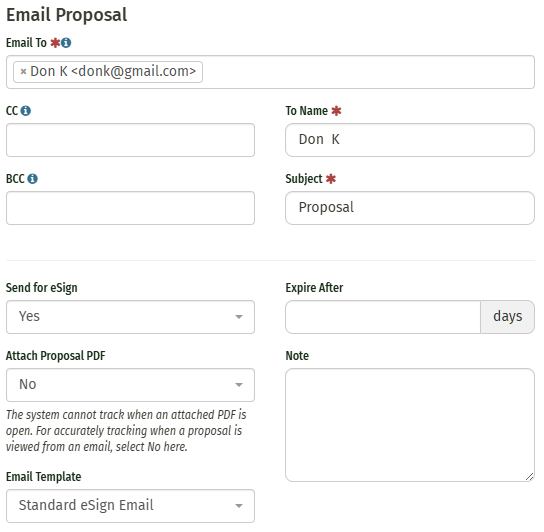
Customer Proposal
Once you have completed your bid, the ‘Customer Proposal’ button allows you to create a PDF of the proposal you will eventually send to your customer.
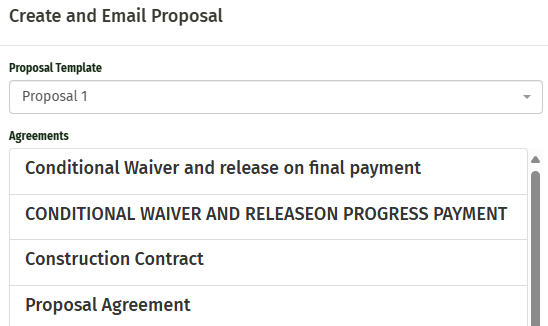
This screen allows you to choose your proposal template, a deposit percentage (if applicable), agreements, and other attachments your company.
After clicking ‘Save’ a PDF will be generated for you to preview and a copy will be stored in the ‘Reports History’ Tab. (As explained in the section above, from this tab you can view your document, email your report directly to your customer, and see the status of the report)