
Editing a Job
There are twelve tabs that can be edited within the job’s page.

Job Information--this tab displays information pertaining to the job
Address--Allows you to input the customer address or just copy it from the Job Information page.
Contacts-- Same as on the datasheets and bids.
Crews/Scheduling-- Here you can add a crew that consists of the resources on the job and schedule a start time and date.
Click the ‘Add Crew’ button to add an open crew

Here you can assign equipment and resources who are assigned to the job.
If you would like the crews labor to be calculated on piece rate, you can input the percentage owed to each resource in the text box located next to the resource’s name. Enter percentages as whole numbers, i.e. 20% = 20

To schedule your job, select ‘Scheduling’
Enter a Start and End Date/Time in the text boxes. You also have the option of assigning a crew and writing notes in the description box
Click ‘Add Calendar Event’ to finish scheduling. This will add your job to the JobPro Scheduler.
You can delete a scheduled event by clicking the red 'X' to the right of the text boxes.


Job Processing--This tab is where you can enter the actual amounts of material used on the jobs
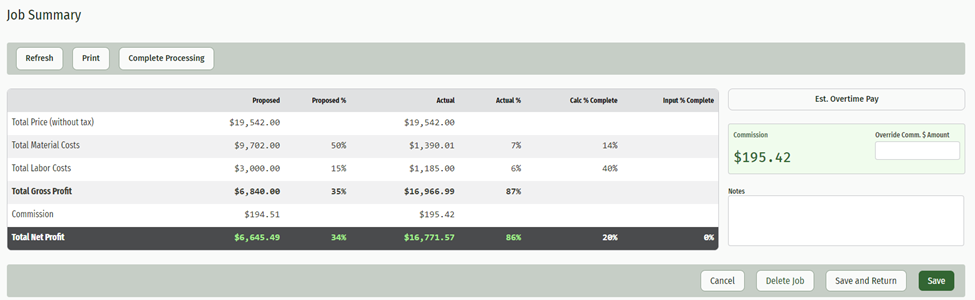
Profitability-- This tab is where you can see the efficiency of your work. That tab is broken into three sections
Job Summary-- This is an overview for the entire job. You will be able to see your Total Profit (Proposed v. Actual). If the total profit is highlighted in green, then that means you have met or exceeded your proposal. If the total profit is highlighted in red, then that means you failed to meet your proposed profit.
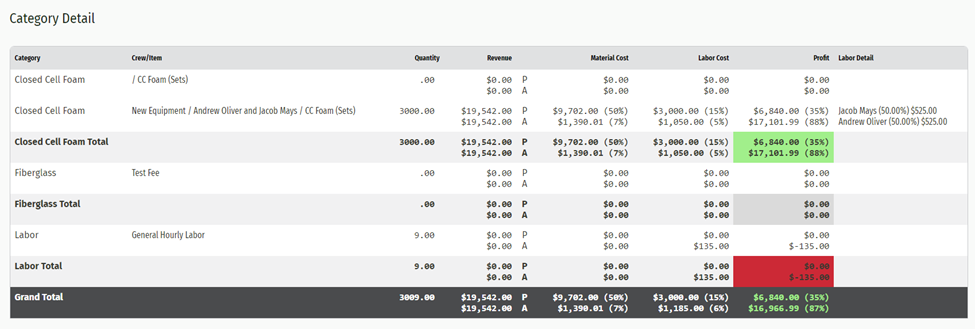
Category Detail-- This section breaks down each item by category to give you more information to where you may have lost or gained profit. The top row represents your proposed amounts and the bottom row represents your actuals.
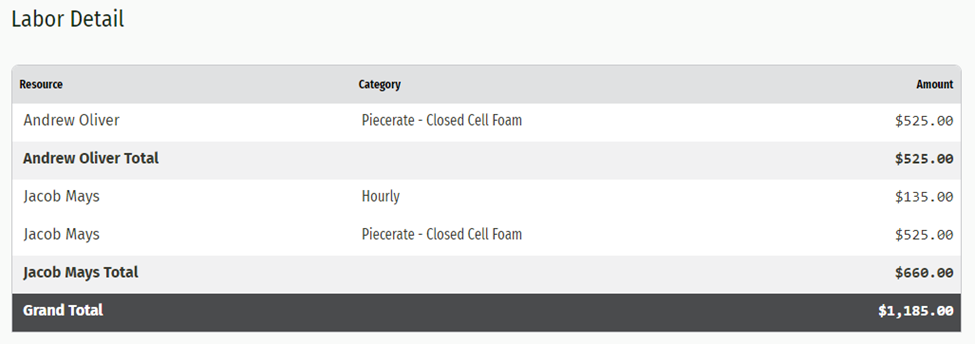
Labor Detail-- The last section breaks down the labor for the job. This section will factor in piece rates as well as time entered in the time entry tab.
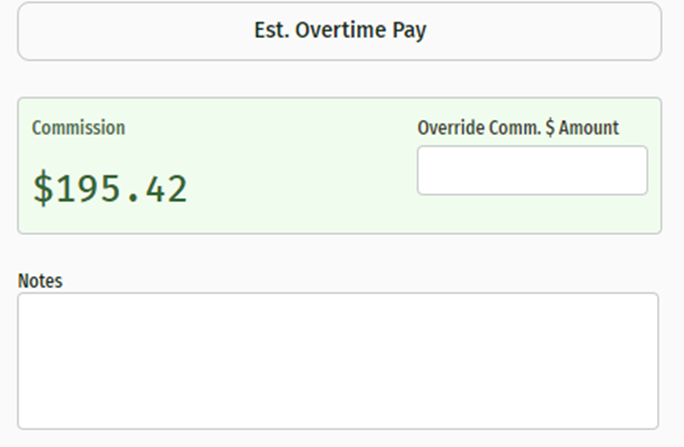
From this tab you can also add notes and override the salesman’s commission by a total amount or a percentage of the gross profit
Change Orders-- This tab allows you to add and view any change orders that you may have on a job.
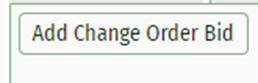
to add a change order, click the ‘Add Change Order Bid’ button
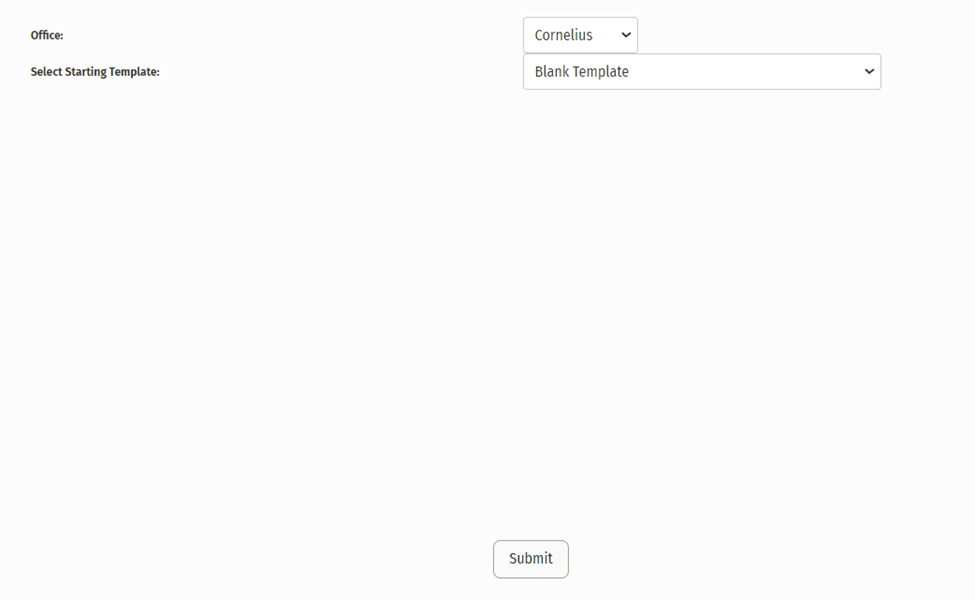
This will prompt a new screen where you have the option to choose the office location and a starting template. Clicking ‘Submit’ will take you to a bid worksheet that you can edit and Finalize to add to the job.
Purchase orders--This tab allows you to view and add new purchase orders
Time-- This tab allows you to add time to a whole crew or individual resource.
Click ‘Add Time’
Resources that have been scheduled to the job will already be loaded into the time entry page. To add different resources click the ‘Add Employee Time Record’ button.
Once your resource has been added, Simply add the work date, hours worked, and rate code (i.e. regular, overtime). You also have the option to assign time directly to an item and add notes concerning the time entry.
To finishing adding time click the green '+' symbol to the right of the resource

Documents--Same as the datasheets and bids, this is where you can upload and store any documents pertaining to this job
Reports History--Same as the datasheets and bids. This is where any PDF reports that were generated from this job will be stored.