Payroll Reports
Pulling Payroll Reports
Navigate to the ‘Reports' dropdown menu located on the main menu bar. Click ‘Payroll Report’
This will bring you to the Payroll Report page. Here you will find any report that has been pulled in the past, plus the option to add a new report. To add a new report, click ‘Add Pay Period’

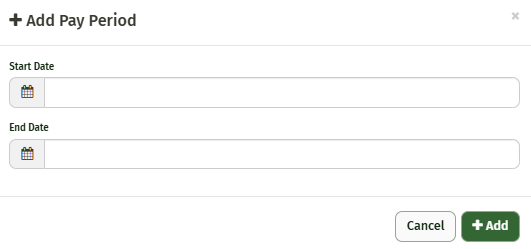
Enter the pay period’s start and end date and click ‘Add’
After adding the new pay period a new screen will load with the following options:
Name-- This is an optional feature that allows you to give this pay cycle a specific name. It is not required, if you do not assign a name you will be able to reference this new cycle by the dates.
Notes-- This is another optional feature that allows you to enter any notes needed in reference to the pay cycle
Summary PDF--this will generate a PDF with the summary totals for each employee. This will include the resources name, employee ID, a total of hours worked, their payrate, any piece rate earned, overtime pay, adjustments, accepted pay, a pay type breakdown, and any added notes
Summary Excel--This generates an Excel workbook that contains the same information as the Summary PDF. The main difference is that you can edit the information within each section
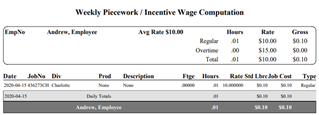
Detail PDF--This will generate a PDF that contains a breakdown of each resources pay. This includes two sections, Hourly Pay and Piecerate Pay. Each section contains the date of install, Job ID#, and Job Name.
The hourly section will break each job down to how many hours worked, the rate, total pay, Clock in and out time, Item time was applied to (if applicable), if it’s costable (yes/no) and any notes added to the time entry.
The Piecerate pay section breaks each job down to quantity installed, rate, total pay, and item installed.
Detail Excel-- This will generate an Excel Workbook with the same information as the PDF. The difference is that you can edit the information within each section.
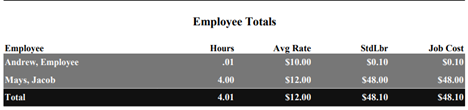
Labor Summary--This option generates a PDF that contains the details of each resources pay in a different format. With a summary page which includes the employee totals.
The next information field includes a list of the employee’s and their pay summary. From here you can expand each resource to view their details, add overtime pay, add pay adjustments, and add any notes for the pertaining to the pay cycle.
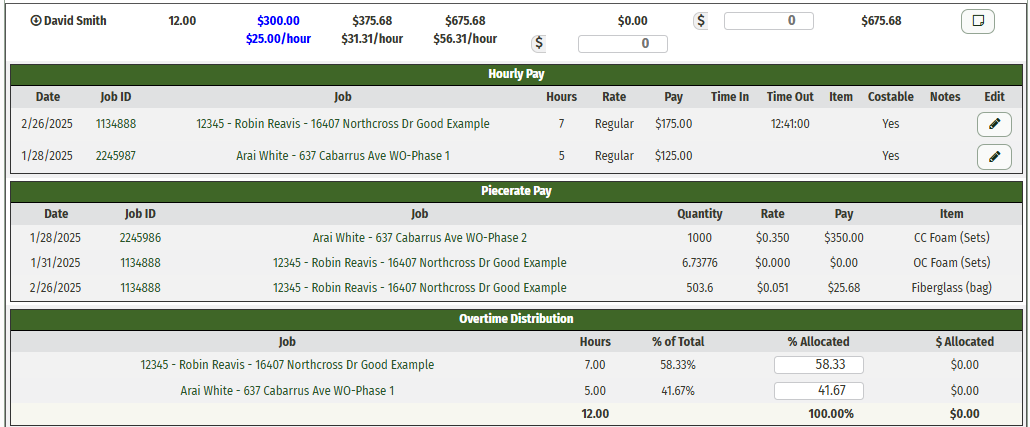
Expanding Employee Details-- to view the employee’s details simply click the arrow located to the left of the resources name. This will cause a dropdown of the employee’s details for the pay period.
The Details include the Hourly, Piece rate and Overtime Distribution. Within these sections you will find the date of work, job ID, job name, quantity of work (whether that is hours or how much material was installed), rate, and pay. This section is helpful if you need to make any quick adjustments to an employees pay. You can add in overtime pay or a payroll adjustment by adding the total in the ‘Overtime Pay’ and ‘Adjustment’ boxes.
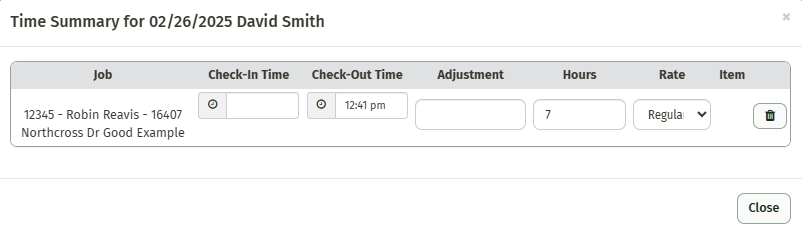
You also have the option to edit the hourly pay by clicking the pencil icon under ‘Edit’. This will generate a new pop-up window that allows you to change the clock in and out time, make a manual adjustment, change the total hours, change the rate, or delete the line all together.
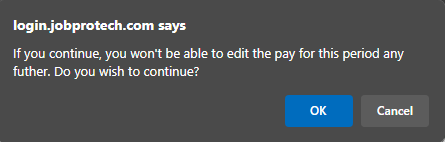
Once you have finished making any necessary changes to your employee’s pay, you can now close out your pay period by choosing the green ‘Close Out Pay Period’ Button. This will save all changes and once this has been closed, you cannot make any further adjustments. Once you click this button a warning notice will pop-up and ask if you are sure you’d like to continue. Click ‘Ok’