
Setting up a Warehouse
The warehouse function in inventory allows you to know where all your items are stored. This way you can easily source your jobs and now how many items you have remaining per item.
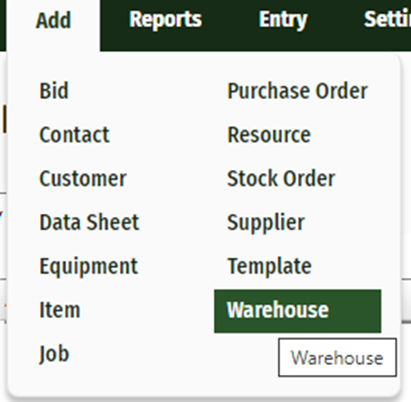
Setting up a Warehouse – Step One
Point to Add on the main menu, then click Warehouse.
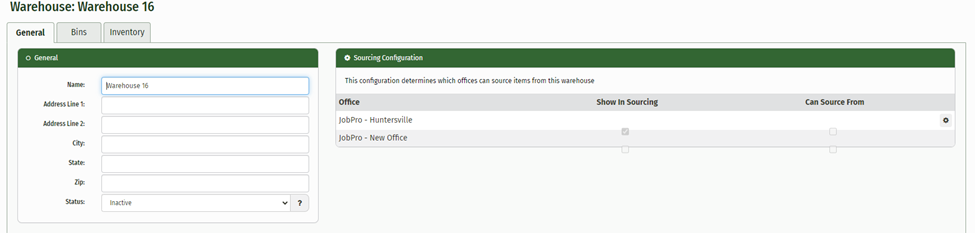
Next, you will need to select the name of this Warehouse and select which office that it will be associated with.

After you name the warehouse, you’ll be taken to the Warehouse general tab. Here, you can give the address for the warehouse and say which offices it can source from.
Next, you can add Bins to your warehouse. This step is entirely optional, but with bins you can assign certain items to specific bins to know their exact location in each warehouse. All you must do is click the Add Bin button in the Bins tab.

Now you are to the point where you can begin adding items to your warehouse. We recommend during your initial warehouse setup that you do a Physical Inventory Count to import all your items into the warehouse. Follow the steps below to begin adding items to your warehouse.